
Sleigh Bed Makeover
- neetlydone
- Aug 31, 2021
- 4 min read
How I modified and upholstered my old sleigh bed to turn it into a modern piece!

Once the feature wall in the guest bedroom was complete, I turned my focus to the furniture that occupied the room. I had an old bedroom furniture set that once was used in our primary bedroom at our old house. We upgraded to a king bed for ourselves and the queen bed with associated dresser and nightstand was then used for guests.
In our current home, our guest bedroom being only a 11’x12’ room needed all the available space it could get and our dated sleigh bed took up way too much room with its curved head and footboards. While it would have been quicker and easier to purchase a new bed frame, I was determined to get some more use out of the one we already had by modifying it. I decided that if I cut the curves off the bed I would gain about 6-8 inches in the room and to me that was worth it.
I had my husband use our reciprocating saw and cut the headboard down to where the wood no longer curved. I eventually did the same with the footboard. Once the headboard was chopped off, it was time to think of a way to build a new one in its place. Given the shape of the remaining bed frame, it seemed most practical to create a headboard box or sleeve that slid over the geometry of the bed.

I created this headboard sleeve using two sheets of 1/2” plywood that sandwiched a 1”x 3” strip of wood on the sides and top. To keep things simple I kept the height of the headboard 4 feet which is the width of the plywood sheet and only cut the length to the size of the width of the bed. Before creating this box I added a few pieces of wood as ribs so the headboard would not flex in the middle if someone leaned on it. The front face of the headboard box needed two slots cut out so the headboard could slide over the side rails of the bed.


Once all the wood was secured with screws my husband and I did a test fit of this sleeve over the bed frame and it fit perfectly!
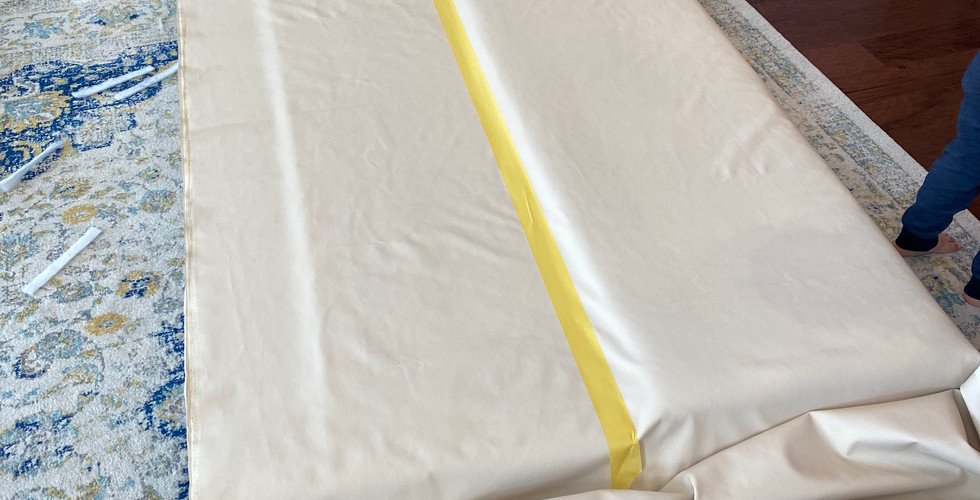
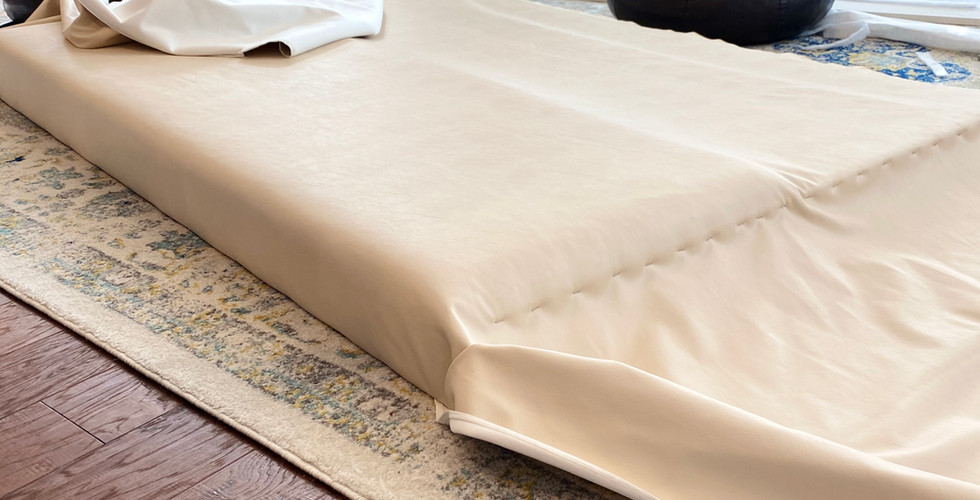
Once the foam was secured with some spray adhesive I covered the headboard in batting just to soften the hard edges before covering with a cream faux leather fabric. To secure the fabric, I wrapped the wooden box with fabric as though wrapping a Christmas present and secured the fabric to the sides and back with my staple gun. I also wanted to add some dimension to the headboard so I added 1"x 4" pine boards covered in batting and fabric and secured those to each side to create more of a wingback look. Adding this detail made the headboard look a little more detailed and finished. Once all the fabric was attached without creases, I cut out the fabric around the slots on the front face so the headboard could slide over the bed frame.


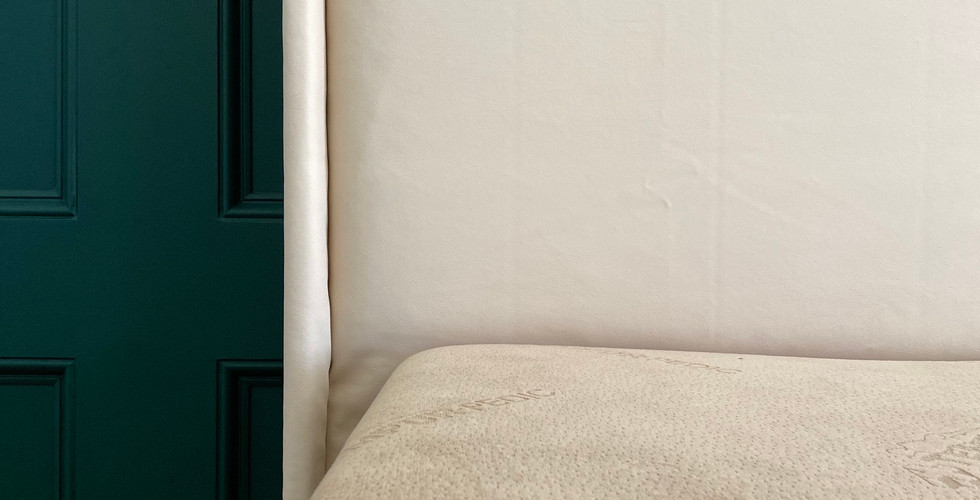
My husband and I slid the finished headboard over the bed and it was a snug but good fit. We gave it a test run and leaned on it while sitting on the bed and there was some play which allowed the headboard to move. Since I wanted it to be secure, we chose to screw the back face of the headboard to the legs of the bed at the bottom from the back. These screws are not visible when the bed is against the wall and you are looking at the headboard.


Once the headboard was complete, I had to finish the footboard. Since that was also a curved piece I cut it down with the reciprocating saw. I then capped the unfinished top with a 1"x3" pine board cut to the width of the bed. I then wrapped that wood piece with batting and then ultimately wrapped fabric around it to soften the edge and tie it in with the headboard. As a final finishing touch I added a piece of corner molding where the fabric was stapled to the wood since the staples were visible. Once I nailed the molding in place, it looked cleaner and more finished. When the bed is made, the footboard is not visible as the comforter or coverlet drapes over the foot of the bed. However, if anyone sat at the foot of the bed, I wanted to make sure that they wouldn't be met with a hard wooden edge and that it was low and soft enough to be comfortable for sitting.


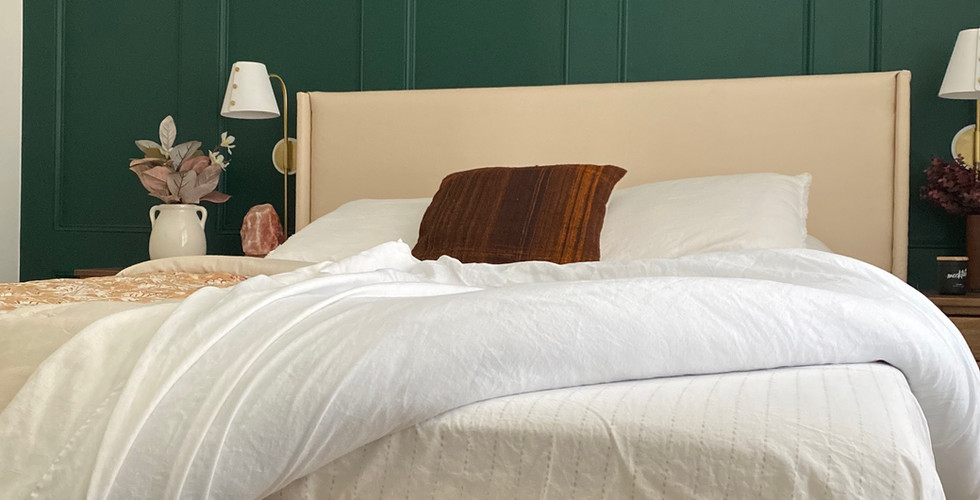


I love how this bed transformed into something that adds to the design of the room and does not take away from it. I especially get great satisfaction in being able to prolong the use of this bedroom set for a little while longer. If you are debating getting rid of furniture from your home, I hope I have inspired you to try and modify it into something you can love again. I love giving old things new purpose and saving things from the landfill and while I cannot guarantee that I will keep this bed forever, for now it fulfills its purpose and still looks aesthetically pleasing while taking up much less room in our small guest space.
As always, thank you for reading!


Comments